Install dependencies
Install runtime tooling with
mise and then install Node dependencies with pnpm:mise installs the exact Node, pnpm, and turbo versions pinned in mise.toml (run mise trust if prompted). If you don’t use mise, install Node, pnpm, and turbo yourself at the versions listed in that file.Build packages
Build the packages the API and dashboard depend on. Run these two commands in order:The first command builds shared UI primitives; the second builds everything the API transitively depends on. Both are incremental — re-running after a code change only rebuilds what changed.
Start infrastructure services
Bring up the Docker Compose stack:This starts the following services in the background:
A demo repository
| Service | Purpose |
|---|---|
| PostgreSQL | Primary database for Shipfox state |
| Temporal | Workflow orchestration engine used internally by Shipfox |
| Gitea | Local Git hosting (simulates GitHub for local push triggers) |
| Object storage (garage) | S3-compatible storage for step-log artifacts |
shipfox/demo is seeded automatically. You can connect this repository to a project for your first run without needing a real GitHub repo.The stack binds fixed host ports: 5432 (PostgreSQL), 7233 (Temporal), 3000
(Gitea HTTP), 2222 (Gitea SSH), and 3900 (object storage S3). If
docker compose up fails with “port is already allocated”, override the
conflicting port with the matching variable — SHIPFOX_POSTGRES_PORT,
SHIPFOX_TEMPORAL_PORT, SHIPFOX_GITEA_HTTP_PORT, SHIPFOX_GITEA_SSH_PORT,
or SHIPFOX_GARAGE_S3_PORT — before running the command again.Start the API and dashboard
Open two terminal windows and start the API and dashboard processes:Wait until both processes are ready before proceeding. The API prints
Server listening at http://127.0.0.1:16101; the dashboard prints VITE ready. The dashboard is available at http://localhost:5173 and the API at http://localhost:16101.Create your account and workspace
Open After verification, the dashboard walks you through setup: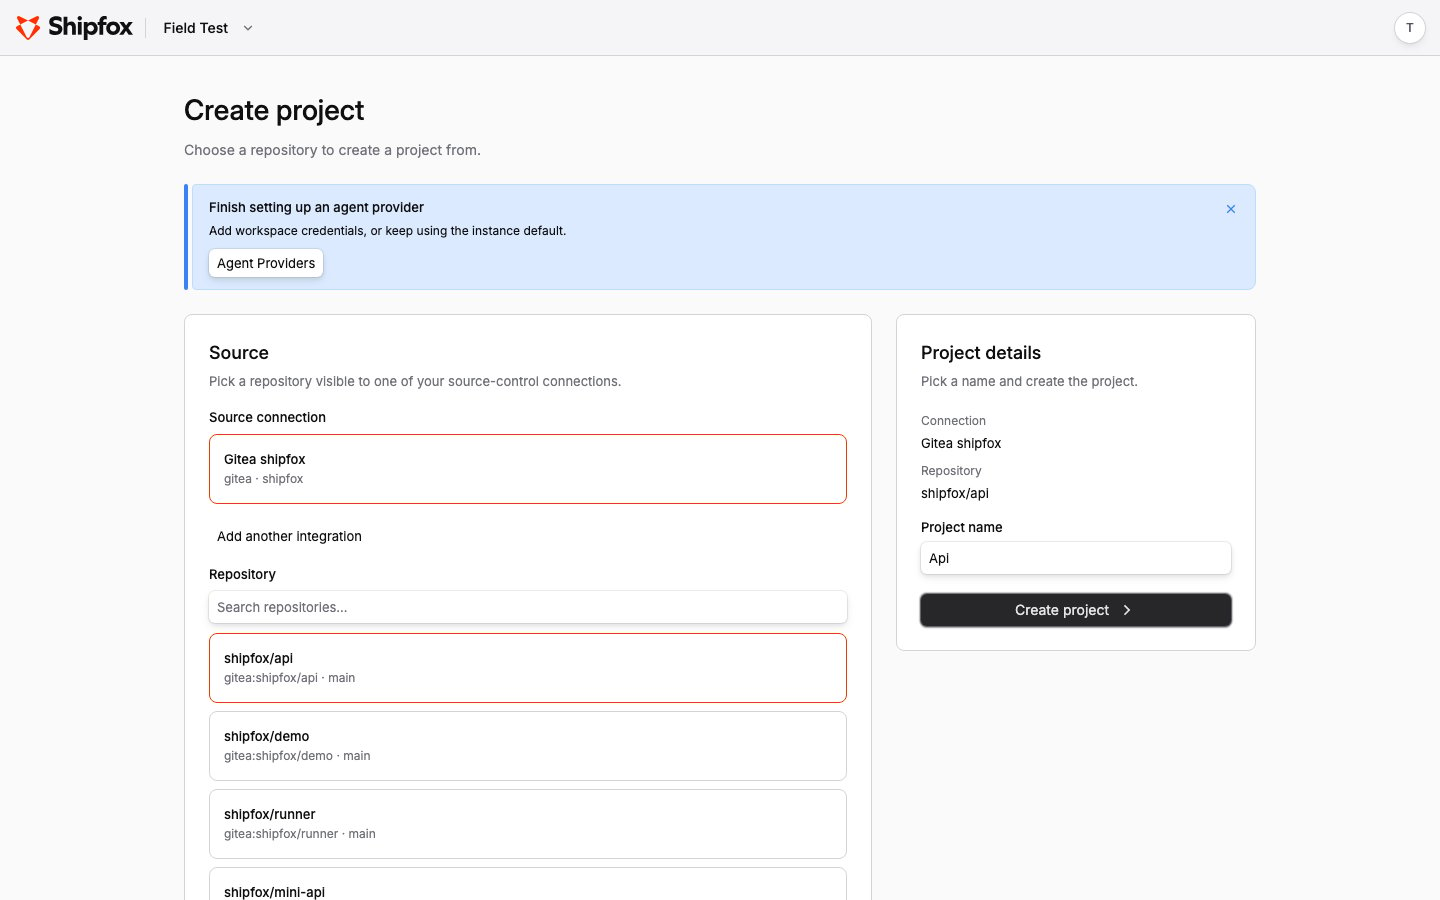
http://localhost:5173 and sign up with any name, email, and password.Signup asks you to verify your email. In evaluation mode there is no mail
server — the API prints every email to its terminal. Find the line containing
Verify your email in the API logs and open the verification link it
contains.- Create your workspace — pick any name.
- Install source control — choose Gitea and enter the organization
shipfox(the org seeded by Docker Compose). - Configure agent provider — skip this unless you want to run agent steps immediately.
- Create project — pick a seeded repository such as
shipfox/demo. The project name is pre-filled from the repository.
Register a runner
A runner is required to execute jobs. Follow these steps to register one:The runner reads 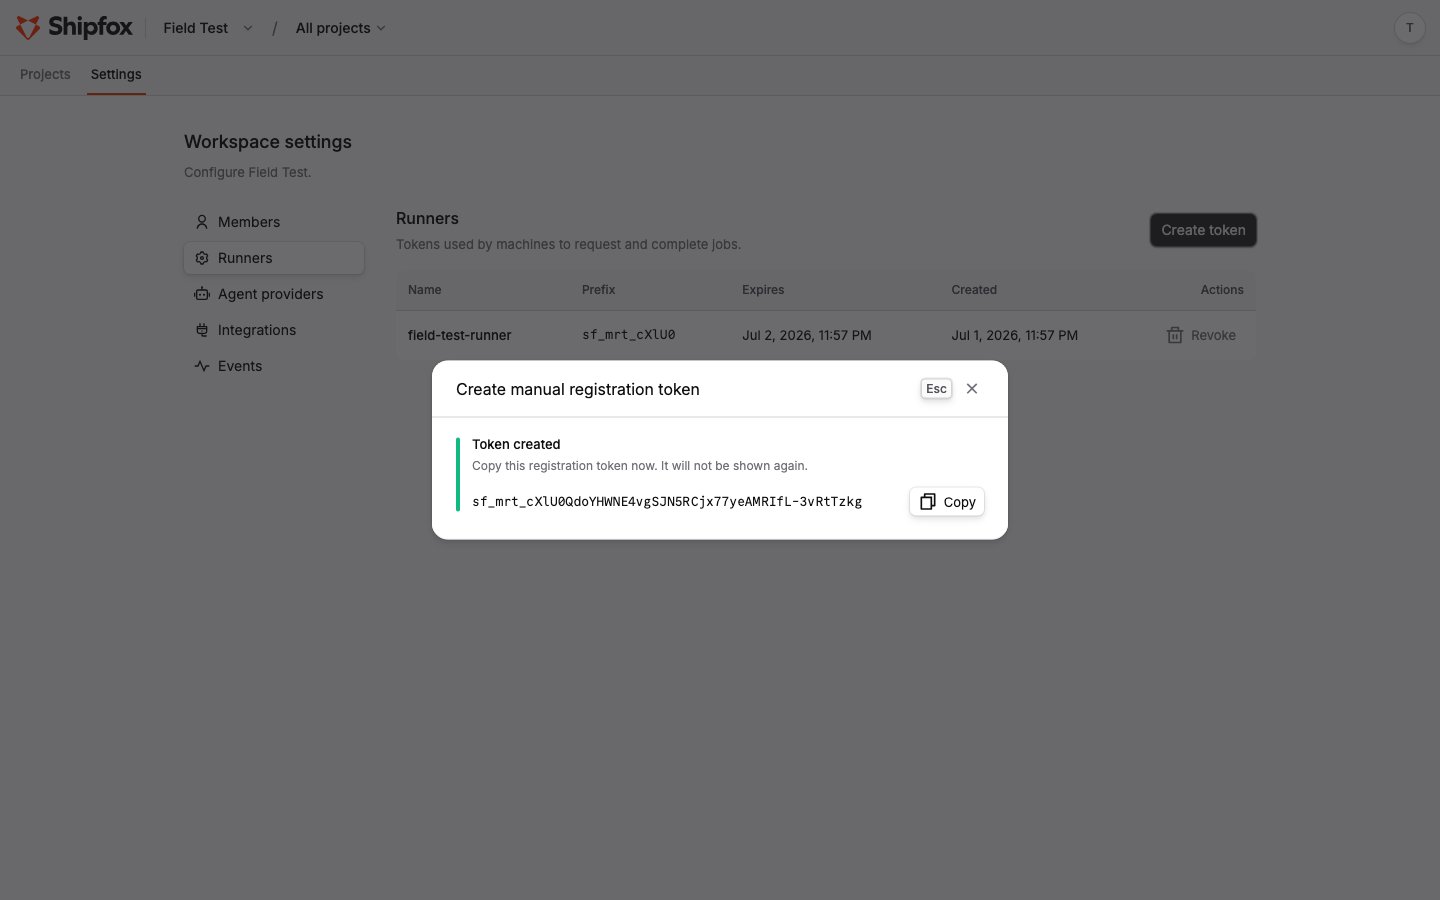
- Go to Settings → Runners and click Create token. Name the token, pick an expiry, and copy the token — it is shown only once.
- Start a runner in a third terminal, passing your token and labels as environment variables:
SHIPFOX_API_URL, SHIPFOX_RUNNER_REGISTRATION_TOKEN, and SHIPFOX_RUNNER_LABELS from its environment. Within a few seconds its terminal prints Runner session registered — the runner is now polling for jobs. The dashboard does not list connected runners yet; the runner’s own log is the place to confirm it is connected.A runner exits after a default idle window (about 5 minutes). To keep it polling indefinitely during evaluation, add
SHIPFOX_POLL_MAX_DURATION_MS=0 to its environment.Fire your first run
Create a workflow file in the Clone the seeded repo from the local Gitea, add the file, and push. The seeded admin account is Shipfox picks the workflow up within seconds. Open the project’s Workflows page and click Run next to the workflow. Watch the logs stream live in the run detail view.
shipfox/demo repository that uses a manual trigger — for example:gitea-admin / gitea-admin-dev-password, and the Gitea web UI is at http://localhost:3000:In evaluation mode, GitHub push triggers will not fire because the local API is not reachable from GitHub’s webhook infrastructure. Gitea push triggers do fire: the compose stack registers a webhook from the seeded Then
shipfox org to your local API. Add a push trigger with the Gitea connection’s slug as its source:git push to the connected repository and watch the run start.Gitea is the evaluation stack’s local stand-in for GitHub — it exists only in
this Docker Compose setup. Deployed installations (self-hosted or cloud) connect
GitHub; GitLab support is on the roadmap.Agent steps (
model + prompt) require the appropriate provider API key to be set in the runner’s environment. For Anthropic models, set ANTHROPIC_API_KEY before starting the runner process. Other providers use their own key environment variables.