> ## Documentation Index
> Fetch the complete documentation index at: https://www.shipfox.io/docs/llms.txt
> Use this file to discover all available pages before exploring further.
# Getting Started with Shipfox: Run Your First Workflow
> Connect a project, add your first workflow YAML, register a runner, and fire your first run — all in under 10 minutes with Shipfox.
This guide walks you through connecting a repository to Shipfox, writing your first workflow, registering a runner, and firing a run — from zero to a live streaming log in under ten minutes. You'll need access to a Shipfox workspace, a Git repository you can connect, and at least one runner online.
This guide assumes Shipfox is already running for your team — most product engineers join an instance a platform or DevEx team set up.
## Connect your project
A project connects one repository to Shipfox and is the container for all workflows, runs, and settings related to that repo.
Open your Shipfox workspace dashboard and create a project. Pick the source connection, then the repository — the project name is pre-filled from the repository and can be edited.
Shipfox reads workflow files from `.shipfox/workflows/` in the default branch. No extra configuration is needed — any `.yaml` or `.yml` file in that directory is treated as a workflow definition.
## Add your first workflow
A workflow is a YAML file that tells Shipfox when to run (`triggers`), where to run (`runner`), and what to do (`jobs` → `steps`). Create the file `.shipfox/workflows/hello.yaml` in your repository with the following content:
```yaml theme={null}
name: Hello world
runner: ubuntu-latest
triggers:
on_demand:
source: manual
event: fire
on_push:
source: github_acme
event: push
jobs:
build:
steps:
- run: echo "hello world"
```
The fields at a glance:
| Field | What it does |
| ---------- | ---------------------------------------------------------------------------------------------------- |
| `name` | Human-readable name shown in the dashboard and run history. |
| `runner` | Label of the runner that should execute the jobs. Must match a registered runner. |
| `triggers` | A map of named trigger definitions. Each entry has a `source` and an `event`. |
| `jobs` | A map of named jobs. Each job has a `steps` list and optionally a `needs` dependency on other jobs. |
| `steps` | An ordered list of steps. Each step is either a `run` command or an agent step (`model` + `prompt`). |
`filter` is roadmap — the `on_push` trigger fires on every push today; branch or path filtering is not yet evaluated. Push triggers require GitHub; GitLab support is on the roadmap. Use a manual trigger (`source: manual, event: fire`) in the meantime if your repository is not on GitHub.
Commit and push the file to your connected repository. Shipfox detects the new workflow file automatically — no manual import is required.
## Run it
A run is one execution of a workflow. You can start a run in two ways:
* **On demand**: Open the project's **Workflows** page, find the workflow, and click **Run**.
* **On push**: Push a commit to the connected repository — the `on_push` trigger fires automatically.
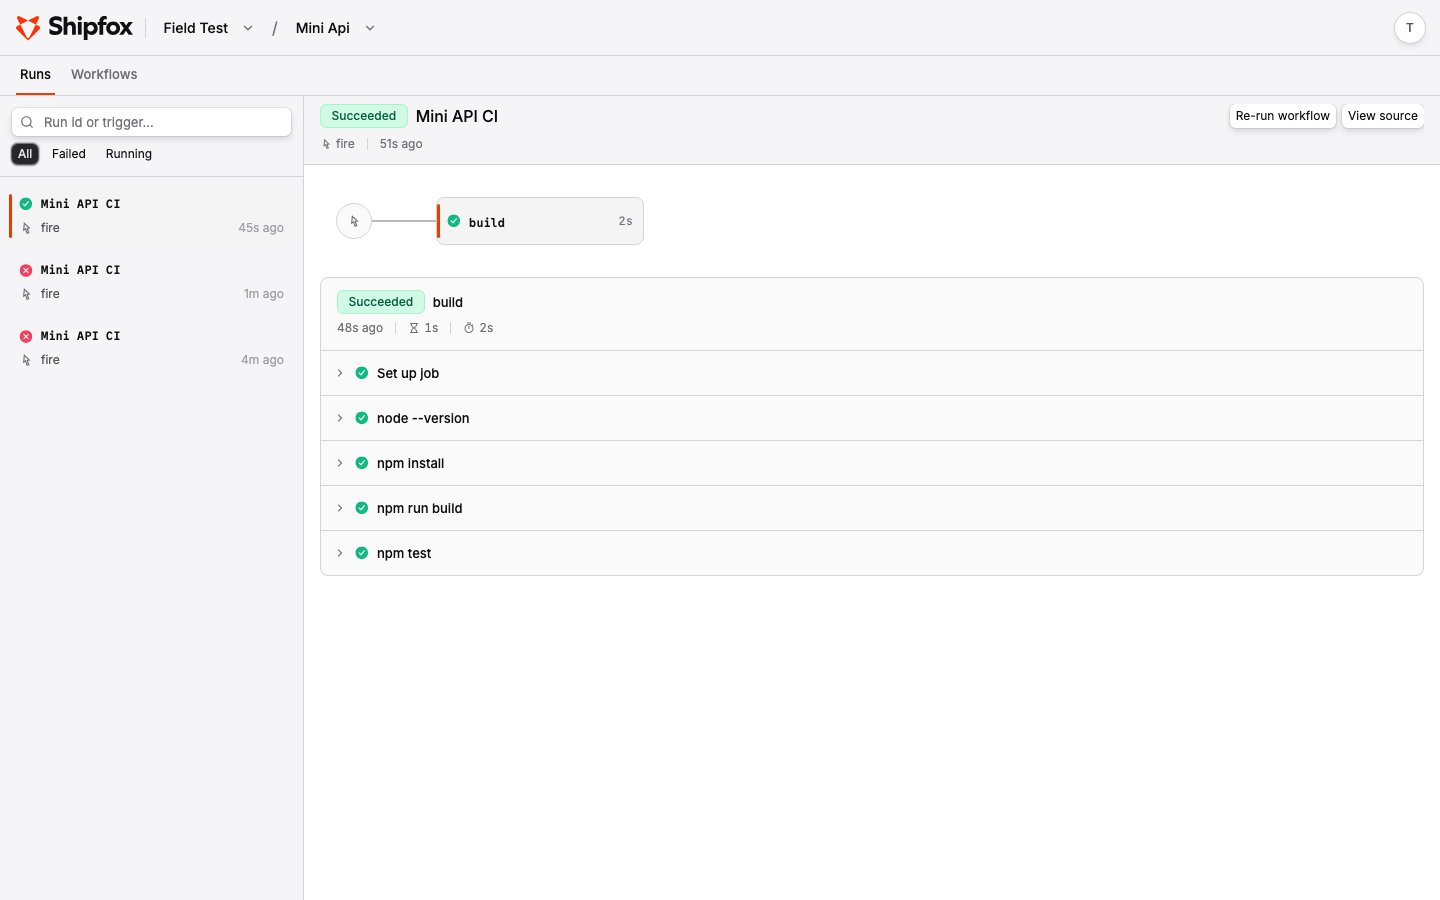
Once the run starts, click into it to stream live output. For the workflow above you should see:
```text theme={null}
build · echo "hello world"
hello world
```
 A run stuck in `pending` usually means no registered runner matches the `runner:` label in your workflow. Check that a runner with the label `ubuntu-latest` is online and connected.
## Add an agent step
Shipfox treats AI agents as first-class steps. Add an agent step to your workflow by specifying a `model` and a `prompt` alongside your existing `run` step:
```yaml theme={null}
jobs:
build:
steps:
- run: echo "hello world"
- name: explain
model: claude-opus-4-8
prompt: >
Read this repository and explain in two sentences what it does
and how you would run its tests.
```
Push the updated file. Fire another run and you should see output similar to:
```text theme={null}
explain · claude-opus-4-8
This repository is a small demo service... To run its tests, ...
```
The agent had your repository checked out — it read real files to answer. Open the step in the dashboard to see the full **agent session**: every message, thinking block, and tool call, plus token usage and cost. Output varies between runs; the step still succeeds or fails based on whether the call completes.
To make the agent *act on your code* — fix failing tests, review a diff — give it a repo-aware prompt and pair it with a [gate](/concepts/gates) so it retries until a check passes. Agent steps use your workspace's configured [model provider](/reference/model-providers), so configure one before running them.
## Let your agent write workflows
You can use a coding agent to generate and iterate on Shipfox workflows directly in your repository. Because every Shipfox documentation page is available as plain Markdown, your agent can fetch the schema reference and author workflow YAML without any special plugin. Simply describe what you want in natural language — for example, "add a Shipfox workflow that runs tests on every push and posts a summary" — and the agent authors the YAML using the workflow schema and Shipfox conventions it reads from the docs.
## Next steps
You now have a workflow running shell and agent steps end to end. From here, add
more jobs and steps, chain them with `needs`, and gate steps with
`gate.success_if` and `gate.on_failure.restart_from` to retry until a condition is
met.
A run stuck in `pending` usually means no registered runner matches the `runner:` label in your workflow. Check that a runner with the label `ubuntu-latest` is online and connected.
## Add an agent step
Shipfox treats AI agents as first-class steps. Add an agent step to your workflow by specifying a `model` and a `prompt` alongside your existing `run` step:
```yaml theme={null}
jobs:
build:
steps:
- run: echo "hello world"
- name: explain
model: claude-opus-4-8
prompt: >
Read this repository and explain in two sentences what it does
and how you would run its tests.
```
Push the updated file. Fire another run and you should see output similar to:
```text theme={null}
explain · claude-opus-4-8
This repository is a small demo service... To run its tests, ...
```
The agent had your repository checked out — it read real files to answer. Open the step in the dashboard to see the full **agent session**: every message, thinking block, and tool call, plus token usage and cost. Output varies between runs; the step still succeeds or fails based on whether the call completes.
To make the agent *act on your code* — fix failing tests, review a diff — give it a repo-aware prompt and pair it with a [gate](/concepts/gates) so it retries until a check passes. Agent steps use your workspace's configured [model provider](/reference/model-providers), so configure one before running them.
## Let your agent write workflows
You can use a coding agent to generate and iterate on Shipfox workflows directly in your repository. Because every Shipfox documentation page is available as plain Markdown, your agent can fetch the schema reference and author workflow YAML without any special plugin. Simply describe what you want in natural language — for example, "add a Shipfox workflow that runs tests on every push and posts a summary" — and the agent authors the YAML using the workflow schema and Shipfox conventions it reads from the docs.
## Next steps
You now have a workflow running shell and agent steps end to end. From here, add
more jobs and steps, chain them with `needs`, and gate steps with
`gate.success_if` and `gate.on_failure.restart_from` to retry until a condition is
met.